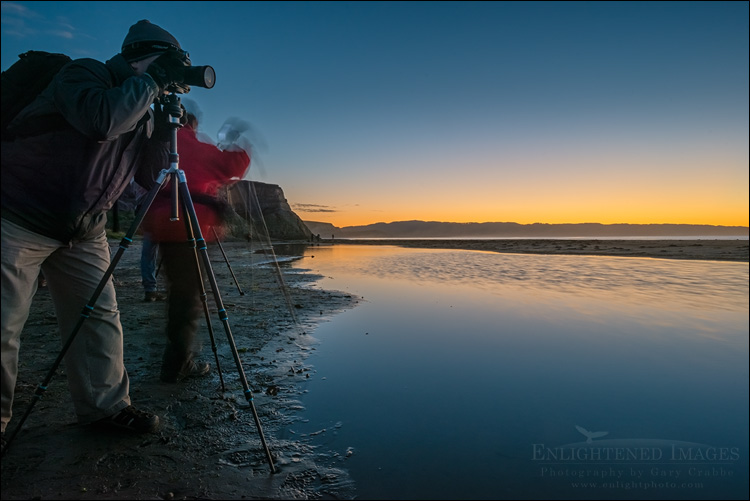
Picture: Photographer shooting at dawn, Drakes Beach, Point Reyes National Seashore, Marin County, California

One of the things I love about teaching workshops are those moments out in the field when I can help a participant solve a problem, especially if it means getting them to think about, explore, play with, or see something differently. This was the case a couple weeks ago during my recent Photographing the Beaches of Point Reyes workshop. I’d gotten all the participants to the parking lot at Drakes Beach 90 minutes before sunrise. (The official time is called “Oh-my-gosh-it’s-still-so-dark-I-can-see-stars-Thirty.”)
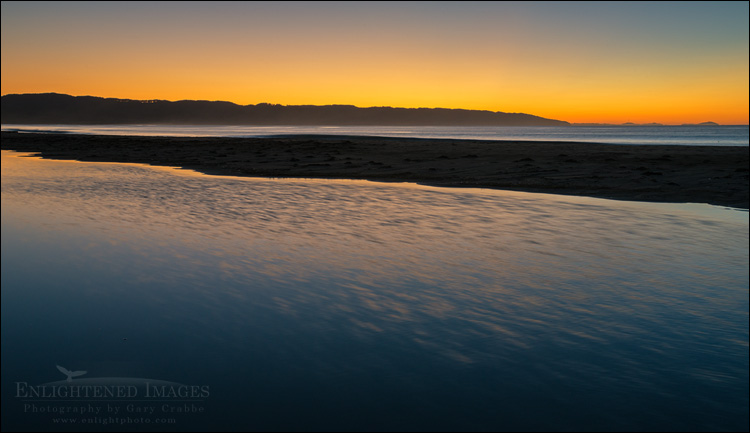
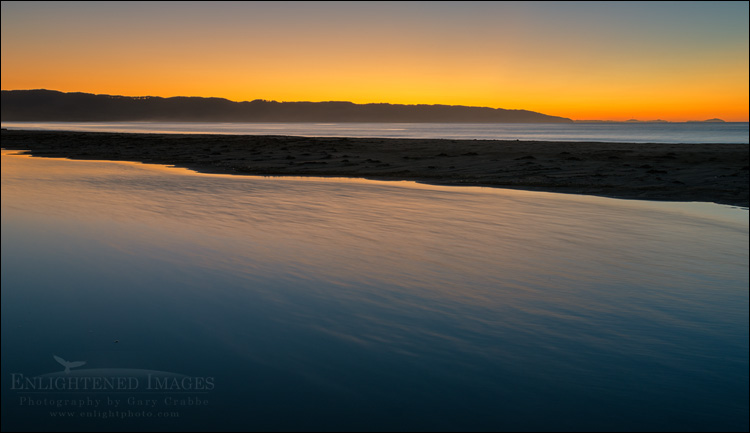
On this occasion, one of the participants noticed the ripples in the water during the pre-dawn light and asked about how to get them sharper in her frame, since she was attracted by the golden light against the dark blue water. I suggested one way to accomplish what she wanted, which would have meant shooting with a much faster shutter speed than the low light levels would have allowed. This could be done by opening the aperture and raising the ISO. However the increase in the ISO would have resulted in more noise throughout the image, and the wider aperture would have reduced her depth of field. I also suggested (and demonstrated) playing with the opposite approach as well, making the ripples softer by extending the exposure time. In this case, I tried to show the difference between a starting exposure from 1.5 seconds (top), and then increasing the shutter speed to five seconds. (bottom) Notice how with the shorter exposure, the ripples are somewhere (non-definitively) between smooth and sharp, whereas with the longer exposure they’re definitively much smoother and more visually appealing in the early morning light. Which of the two images you prefer?


Whenever dealing with capturing motion or time in a photograph, remember there are always two possible approaches: You can either use faster exposures to freeze time and motion, or use longer exposures to really emphasize the sense of time and motion. If circumstances like weather, lighting, or equipment keep you from capturing one type of scene, don’t forget about trying the the opposite approach. In this case, bracketing the length of exposure helped create a softer feeling. If I’d wanted to, I could have extended the exposure even longer by adding a polarizer or neutral density filter. Similarly, if you’re shooting creeks, streams, waterfalls, or ocean waves, try shooting exposures of differing times. Every couple stops of time added or subtracted (adjusting the exposure accordingly) will significantly alter the look and feel of your photograph.
Also, if you have any samples of a scene shot with two notably different exposure speeds, I’d welcome you to include a link(s) in the comments. I’d love to see them.
—
![]()
If you like this post , I would greatly appreciate it if you’d consider sharing this with your friends using one of the Social Media sharing buttons located at the top of this post. You can also sign up to receive free updates by email when future posts are made to this blog.
![]()
—
![]()
—
Gary Crabbe is an award-winning commercial and editorial outdoor travel photographer and author based out of the San Francisco Bay Area, California. He has seven published books on California to his credit, including “Photographing California; v1-North”, which won the prestigious 2013 IBPA Benjamin Franklin Gold Medal award as Best Regional title. His client and publication credits include the National Geographic Society, the New York Times, Forbes Magazine, TIME, The North Face, Subaru, L.L. Bean, Victoria’s Secret, Sunset Magazine, The Nature Conservancy, and many more. Gary is also a photography instructor and consultant, offering both public and private photo workshops. He also works occasionally a professional freelance Photo Editor.

Great post, Gary. Your example of the effect of changes in exposure time reminds me of another thing that folks need to get comfortable with — experimenting! A great thing about digital cameras is that you can much more easily try stuff on your own, look at the result, recalibrate, and refine your concept. This example with various shutter speeds and the ripples on the water is a great example.
Lots of new photographers imagine that the more experienced photographers just know the right answer. In fact, they are more likely to know the answer, based on their previous experience with similar shooting situations. But they/we are also quite happy to learn by experimenting and to try new things to see what happens.
Take care,
Dan
I enjoyed this article only wishing it was more detailed.
Thank you